
Get Your Planter Right For #plant20
Although it’s difficult to believe, spring planting will be just around the corner. Now’s the time to start preparing to make the most important pass across the field – planting – this 2020 season.
In order to make the most of planting this season, you’ve probably already considered several options to improve over last year. For many, it’s an equipment update; others improve existing equipment by adding technology. Whether you’re taking anything new to the field for 2020, or just planning to make the best of what you already have, there are a few things you need to know to ensure your seeds are placed the BEST that they can be this season.
For any of your new technology or hardware to perform at its peak, there are several general maintenance items on your planter’s row unit that should not go unchecked.
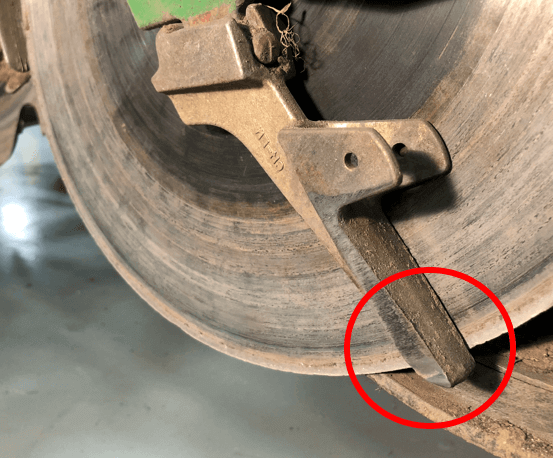
Opening Disks
The primary parts of the row unit that create the seed trench. Perfect seed placement requires a perfect trench.
a. Check for wear – most seeds disks are 15” diameter when new, and they should be replaced if worn at, or past 14.5”
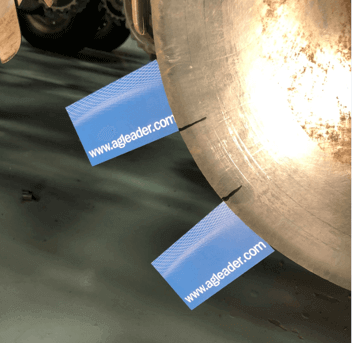
b. Shim properly – target 1.5” – 2” of blade contact area. Using a pair of business cards, slide one in from the top, and the other from the bottom. The space between the cards should be about 2”. Most business cards are 2” wide, so you’ll need to use the tape measure here.

Shimming is important because:
- Too tight generates too much side load on the bearings and will cause premature failure.
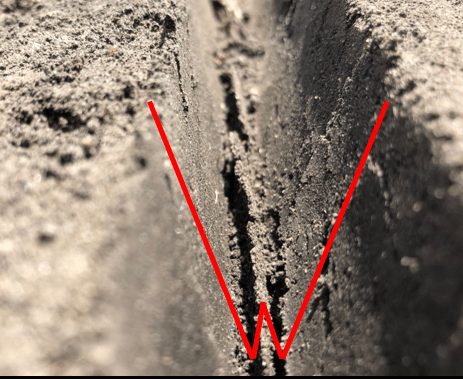
- Too loose and the trench is no longer “V” shaped; instead, it looks more like a “W”. Seeds will not fall to the bottom of the trench, causing inconsistent seed depth.
Note:
Always replace the seed tube guard when replacing opening disks. As the opening disks wear, the rock guard will wear unevenly. When new opening disks are installed over a used seed tube guard, premature wear on the opening disks may result. The guard width is also important to keep the edges of the opening disks away from the seed tube. A worn guard may lead to damage at the bottom of the seed tube, causing inconsistent seed within the trench.
Gauge Wheels
Gauge wheels should be adjusted such that when they are pulled away from the opening disks, there is very slight contact.
Proper adjustment is important because:
Proper adjustment is important because:
- Too tight and the gauge wheel will not turn freely. This can cause premature wear to the gauge wheel, or worse yet, it may not turn in softer soils, causing the row unit to plow soil, rather than create a trench.
- Too loose and the gauge wheel will allow dry soil at the surface in between the opening disk and the gauge wheel. The dry soil falls into the trench prior to closing, causing seeds to germinate at varying rates, leading to uneven emergence. In wet conditions, the gap will allow mud to collect inside the gauge wheel, eventually causing it to seize, requiring it to be removed and cleaned.
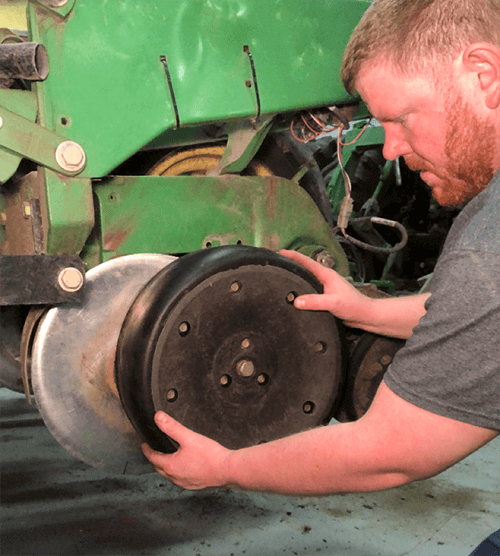
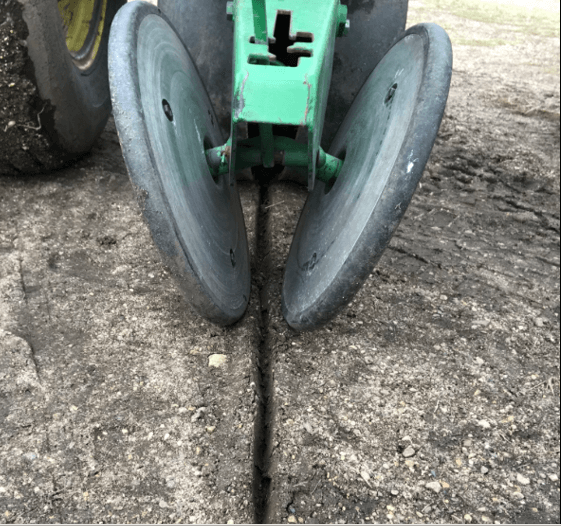
Closing Wheels
Closing wheels are potentially the most often overlooked adjustment. Closing wheels should be centered over the trench. When running off the side, the trench is folded one way or the other, allowing air pockets to remain in the trench, leading to uneven emergence.
a. Simply pull the lowered planter through the farmyard to verify each closing wheel is centered over the trench.

If adjustments are required, loosen and adjust until the closing wheels are running level and centered over the trench.
We hope you find this information helpful to improve your planter’s performance in the coming year. Be sure to also check out our planting products that will be sure to further improve your performance!